
Is your motorcycle mirror loose or wobbling? Tightening the ball joint can fix this easily.
Motorcycle mirrors are crucial for safety, providing a clear view of what’s behind you. Over time, the ball joints can become loose, causing the mirrors to shift or vibrate. This not only affects visibility but can also be annoying. Tightening the ball joint is a simple task that can make your ride safer and more enjoyable.
In this guide, we will walk you through the steps to tighten the motorcycle mirror ball joint, ensuring your mirrors stay in place. Whether you’re a seasoned rider or a beginner, this is a skill worth learning. Let’s get started!
Tools And Materials
Maintaining your motorcycle’s mirrors is crucial for safe riding. Tightening the ball joint on your motorcycle mirror ensures they stay in place while riding. This section covers the necessary tools and materials for the task.
Required Tools
Using the right tools makes the job easier and more efficient. Here are the tools you will need:
- Wrench set – A set of wrenches of various sizes.
- Allen keys – Often used for tightening bolts.
- Screwdriver set – Both flathead and Phillips screwdrivers.
- Torque wrench – To ensure bolts are tightened to the correct torque.
- Lubricant spray – To reduce friction and prevent rust.
- Cloth or rag – For cleaning and wiping excess lubricant.
Materials Needed
Gathering all the necessary materials beforehand saves time. Here are the materials you need:
- Replacement bolts or screws – In case current ones are worn out.
- Thread locker – To keep the bolts secure and prevent loosening.
- Cleaning solution – To clean the mirror and surrounding area.
Having the right tools and materials ensures a smooth and effective repair. Below is a table summarizing the essential items:
| Tools | Materials |
|---|---|
| Wrench set | Replacement bolts or screws |
| Allen keys | Thread locker |
| Screwdriver set | Cleaning solution |
| Torque wrench | |
| Lubricant spray | |
| Cloth or rag |
Credit: www2.rigacci.org
Preparation
Before tightening the motorcycle mirror ball joint, proper preparation is key. Taking the time to get ready ensures a smooth process and prevents any accidental damage. Let’s dive into the steps you need to follow for a successful preparation.
Safety Precautions
First, ensure you have the right protective gear. Wear gloves to protect your hands. Safety goggles are important to shield your eyes from debris. A stable bike stand will keep the motorcycle from tipping over. Do not skip these steps.
Workspace Setup
Next, set up your workspace. A flat, stable surface is essential. Good lighting helps you see what you’re doing. Gather all necessary tools like wrenches and screwdrivers. Keep them within reach to avoid wasting time. Clear the area of any distractions or hazards. This will help you focus on the task at hand.
Having a clean, organized space makes the job easier. You’ll work more efficiently and safely.
Removing The Mirror
Removing the mirror is the first step in tightening the motorcycle mirror ball joint. This process involves two main actions: loosening the screws and detaching the mirror. Follow these steps to ensure you do it safely and effectively.
Loosening The Screws
To begin, you’ll need a screwdriver that fits the screws on your mirror mount. Choose the right tool to avoid stripping the screws. Place the screwdriver into the screw head and turn it counterclockwise. Be careful not to apply too much force, as this can damage the screw head.
- Identify the correct screwdriver.
- Insert it into the screw head.
- Turn counterclockwise to loosen.
Once the screws are loose, you can remove them completely. Keep the screws in a safe place to avoid losing them.
Detaching The Mirror
After the screws are removed, grip the mirror firmly with both hands. Carefully pull the mirror away from the mount. You may need to wiggle it slightly to free it completely.
- Hold the mirror firmly.
- Gently pull it away from the mount.
- Wiggle if necessary to release it.
Now the mirror is detached, and you can proceed to tighten the ball joint. Handle the mirror with care to avoid breaking the glass or damaging any parts.

Credit: www.reddit.com
Tightening The Ball Joint
Tightening the ball joint of your motorcycle mirror is important. It ensures your mirrors stay stable while riding. A loose mirror can be dangerous, as it affects your visibility. Follow these steps to tighten the ball joint and keep your mirrors in place.
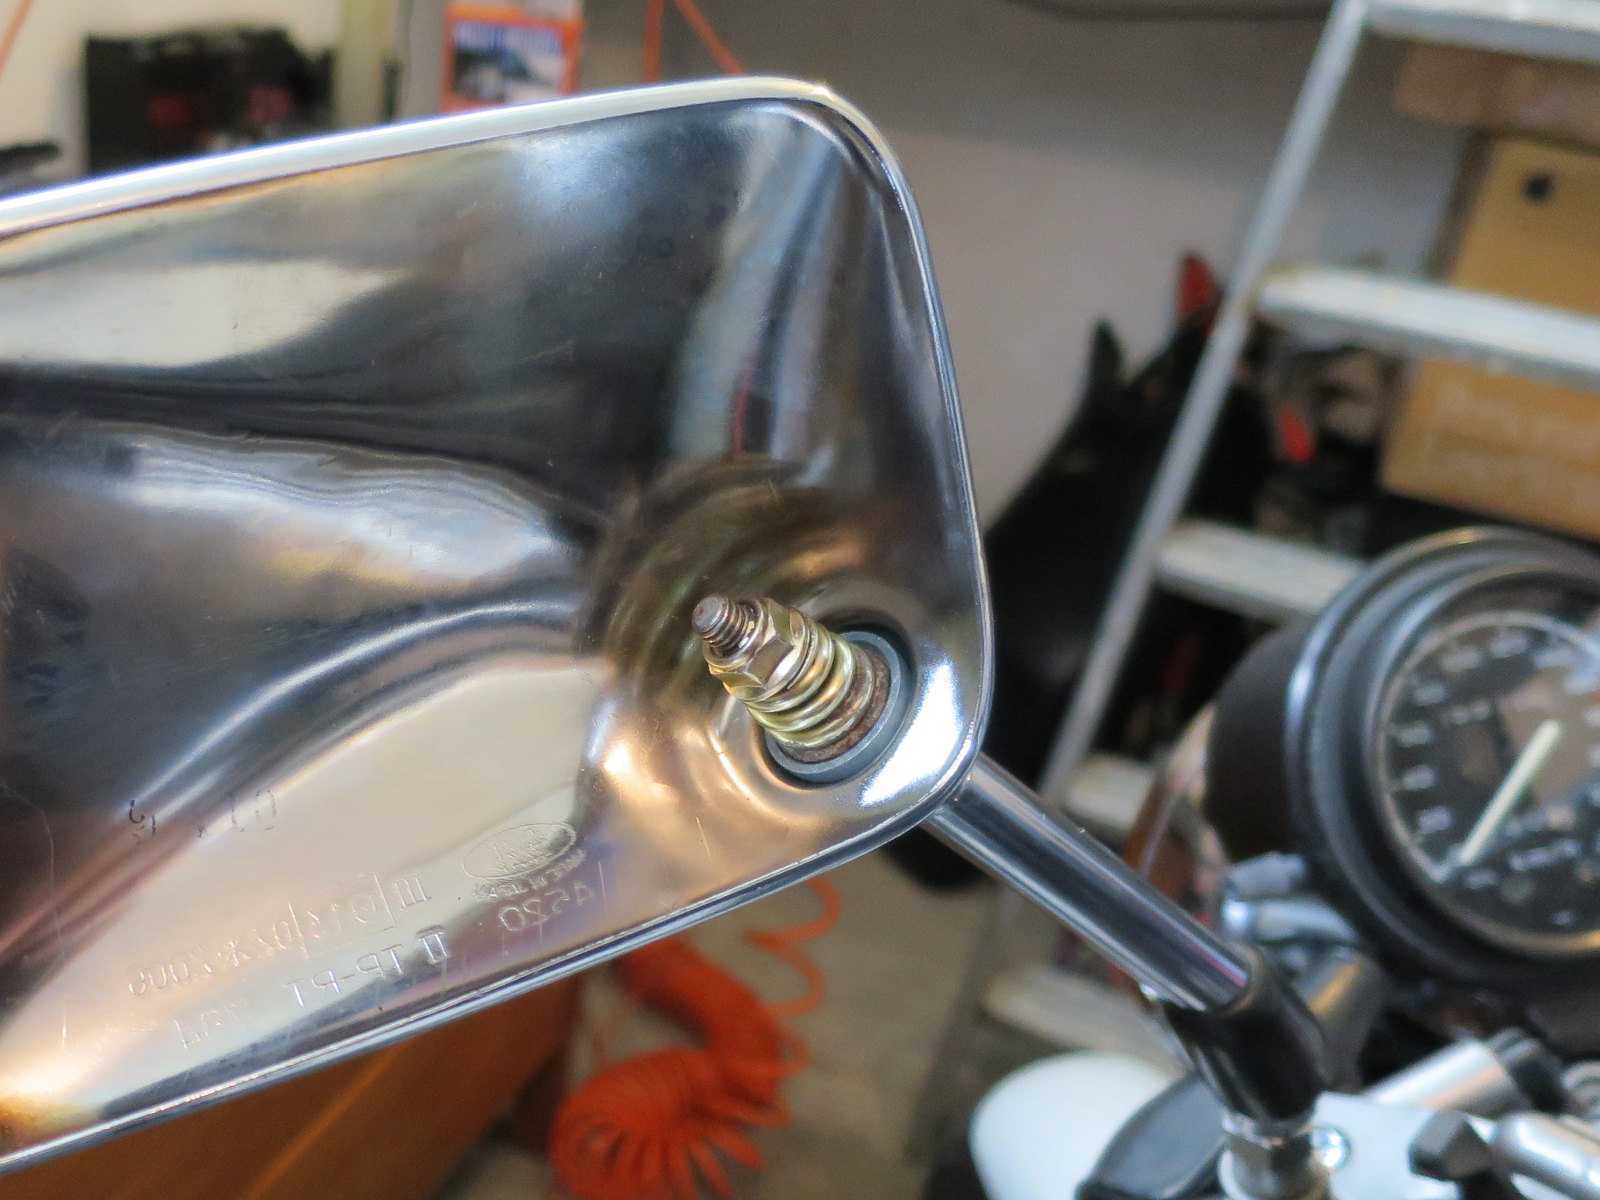
Locating The Ball Joint
First, find the ball joint on your motorcycle mirror. The ball joint connects the mirror to the arm. It allows the mirror to pivot and adjust. It is usually covered by a protective cap. Remove this cap to access the ball joint.
Adjusting The Tightness
Once you have located the ball joint, you can adjust its tightness. You will need a wrench or screwdriver, depending on the type of fastener used. Here is a simple step-by-step guide:
- Hold the mirror steady with one hand.
- Use the wrench or screwdriver to tighten the fastener.
- Turn the fastener clockwise to tighten.
- Check the mirror’s stability after tightening.
- Adjust as needed to ensure the mirror stays in place.
Tip: Do not overtighten the fastener. This can damage the ball joint. Tighten just enough to keep the mirror stable.
If the ball joint is too tight, loosen it slightly. Turn the fastener counterclockwise to loosen. Test the mirror’s movement and adjust accordingly.
By following these steps, you can easily tighten your motorcycle mirror ball joint. This ensures your mirrors remain secure and provide clear visibility during your rides.
Reassembling The Mirror
Once you have tightened the motorcycle mirror ball joint, it’s time to reassemble the mirror. This step is crucial to ensure your mirror stays in place while you ride. Follow these steps to properly reassemble and secure your motorcycle mirror.
Attaching The Mirror
Begin by placing the mirror back onto the ball joint. Ensure the mirror is aligned correctly for optimal visibility. Gently press the mirror down to fit onto the ball joint securely. Avoid using excessive force to prevent damage.
Securing The Screws
Locate the screws that hold the mirror in place. Insert the screws into their respective holes. Use a screwdriver to tighten them. Make sure the screws are snug, but do not over-tighten. Over-tightening can strip the threads and weaken the hold.
Check the mirror’s stability by giving it a slight push. If it moves, tighten the screws a bit more. Ensure the mirror remains steady and does not wobble. A stable mirror is essential for safe riding.
Testing The Mirror
Testing the mirror is a crucial step in ensuring your motorcycle mirror is properly adjusted. This ensures you have a clear view of the road behind you, making your ride safer. Below are key points to check while testing your mirror.
Adjusting The View
Start by sitting on your motorcycle. Ensure you are in your usual riding position. Adjust the mirror until you can see the road behind you clearly. The goal is to minimize blind spots. Check both sides to ensure the view is balanced. Repeat the process if needed.
Ensuring Stability
Once the view is adjusted, test the mirror for stability. Gently tap the mirror and observe if it moves. The mirror should stay in place without wobbling. If it moves, tighten the ball joint further. Take your motorcycle for a short ride. Observe if the mirror holds its position. If it shifts, additional tightening may be required.
Maintenance Tips
Maintaining your motorcycle mirrors is crucial for safety and visibility. Loose mirrors can be a hassle. You need regular care to keep them in good condition. Below are some key maintenance tips.
Regular Checks
Check your motorcycle mirrors often. Inspect the ball joint for any signs of wear. Look for cracks or rust on the mirror housing.
If the mirror is loose, adjust the ball joint. Use a wrench to tighten the nut. This simple action can make a big difference.
Make a habit of checking your mirrors before every ride. This ensures your safety on the road.
Lubrication Advice
Lubrication keeps the ball joint moving smoothly. Use a small amount of silicone spray or WD-40.
Spray the lubricant on the ball joint. Move the mirror to distribute the lubricant evenly. Wipe off any excess to avoid dirt buildup.
Lubricate the ball joint every few months. This helps prevent rust and ensures easy adjustments.
Keep your mirrors in top condition. Regular checks and proper lubrication are key. Enjoy a safer ride.

Credit: www.reddit.com
Frequently Asked Questions
How Do I Tighten A Motorcycle Mirror Ball Joint?
To tighten a motorcycle mirror ball joint, locate the adjusting screw. Use a suitable tool to turn the screw clockwise. Ensure the mirror’s position is stable.
What Tools Are Needed To Adjust The Mirror Ball Joint?
You typically need a small wrench or screwdriver. Check your motorcycle’s manual for specific tool recommendations to avoid damage.
Why Is My Motorcycle Mirror Loose?
Motorcycle mirrors become loose due to vibrations or wear. Regular maintenance and tightening can prevent this issue and ensure safe riding.
Can I Tighten The Mirror Ball Joint Myself?
Yes, you can tighten the mirror ball joint yourself. Follow the steps in your motorcycle’s manual for guidance.
Conclusion
Tightening your motorcycle mirror ball joint doesn’t need to be complex. Follow these simple steps. Gather your tools. Adjust the mirror to the right position. Tighten the screws firmly. Check for any wobble. Repeat the steps if necessary. A well-tightened mirror ensures safety and better visibility.
Keep your bike in top shape. Regular maintenance prevents bigger issues. Enjoy smoother rides with clear views.

My name is Carson Mackey and I specialize in mirror/glass. With over 8 years of experience in the glass/mirror industry, I am well-versed in all aspects of fabrication, repair and installation. I take great pride in providing my clients with the best quality of service and products. I am passionate about my work and strive to help my clients realize their vision.
Honestly, I am dedicated to providing the best services and products to my customers and I’m always open to learning new techniques and working with advanced materials. Basically, this is a place where I will share my thoughts and experiences on Mirror. And this website (http://mirrortopics.com) is an outlet of my deep passion for Mirror.
I want to clear about MirrorTopics that it’s not any agent or hired organization. It fully customize by me. So I hope, posted information will Realistic and authentic. Although I will do enough research before posting but if you notice any wrong or mistake on my article, please contact with me without any hesitation. As well as you can suggest me about content quality, authentication and so on by using our Contact US page. Thank you my friend to support me.