
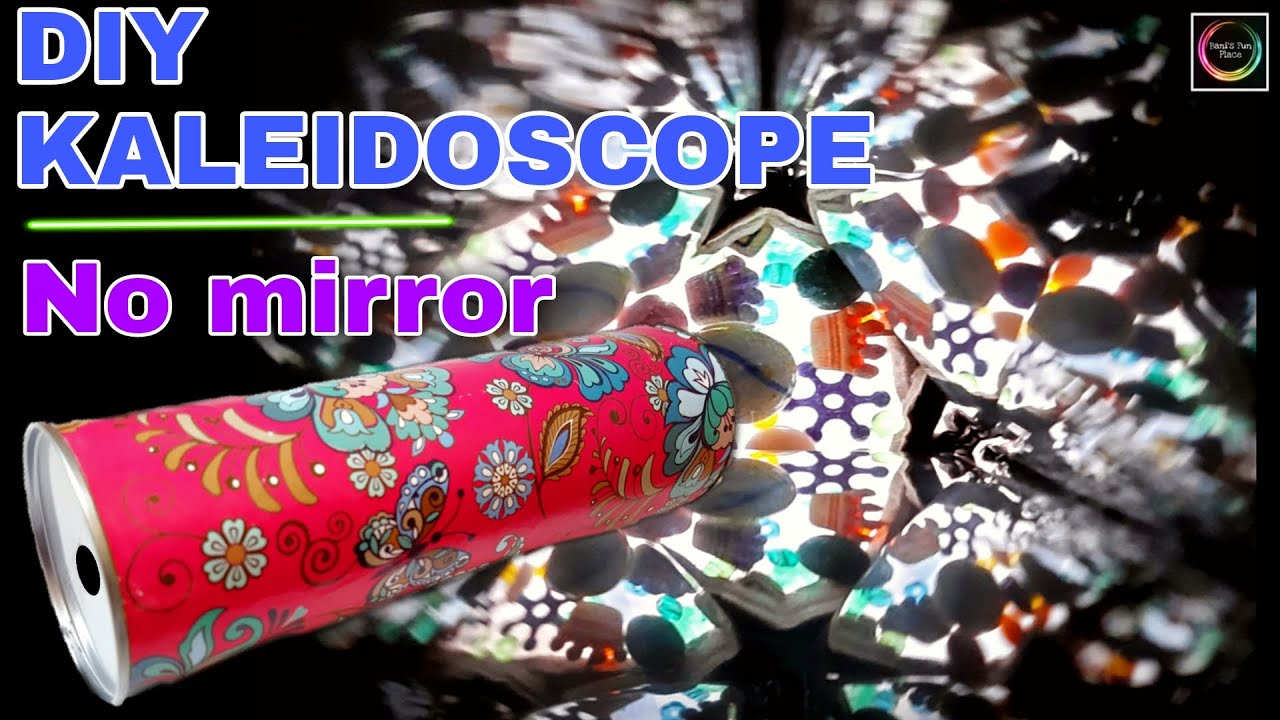
Creating a kaleidoscope without mirrors is possible. You can use simple materials instead.
This fun project is perfect for kids and adults alike. A kaleidoscope is a fascinating toy that creates beautiful patterns. Traditionally, mirrors are used to reflect light, but there are other ways to achieve the same effect. By using alternative materials, you can still enjoy the mesmerizing designs without needing mirrors.
This guide will show you step-by-step how to make a kaleidoscope without mirrors, using items you probably have at home. Get ready to explore the magic of light and color in a new, creative way. Let’s dive into this exciting DIY project and see the wonders you can create!

Credit: www.onecrazymom.com
Preparing The Materials
Gather cardboard tubes, colorful paper, plastic wrap, and glue. These materials are essential for creating a kaleidoscope without mirrors.
Choosing The Right Cylinder
Select a cardboard tube. A paper towel roll works well. The tube must be clean. Ensure it has no tears. The size of the tube matters. Bigger tubes give a wider view. Smaller tubes are easy to handle. Both sizes work great. It is your choice.
Gathering Decorative Elements
Collect colorful beads and shiny sequins. Small pieces of colored paper are good. Glitter adds sparkle. Stickers can add fun designs. Foil pieces reflect light well. All these items make the view exciting. Have a variety for the best effect.

Credit: www.facebook.com
Creating The Viewing Tube
Find a cardboard tube. A paper towel roll works well. Cut it to the right length. Use scissors or a craft knife. Be careful while cutting. Make sure the edges are smooth. You can use sandpaper if needed.
Cover one end of the tube with plastic wrap. Use a rubber band to hold it in place. The wrap should be tight. This will be the viewing end. For the other end, use wax paper. This end should be secured with a rubber band too. Make sure it is firm.
Designing The Inner Chamber
Creating a kaleidoscope without mirrors is easy and fun. Use colorful beads, a paper towel roll, and plastic wrap. The inner chamber’s design reflects light, creating stunning patterns.
Adding Colorful Beads
Choose small, colorful beads for the kaleidoscope. Plastic beads work best. They are light and come in many colors. Mix different shapes and sizes. Use at least three colors. This adds variety and beauty. Make sure the beads are clean. Dust can affect the view.
Using Transparent Materials
Use transparent materials for the tube. Clear plastic is a good choice. It lets light pass through. This makes the colors inside shine. Cut the plastic to the right size. It should fit around the beads. Tape the ends to secure it. Make sure there are no gaps. Light should only enter through the ends.
Constructing The Kaleidoscope
Gather all the materials needed. Use a cardboard tube for the body. Cut colored paper into small pieces. Glue them on the inside of the tube. Ensure they cover the entire surface.
Next, cut out two circles from clear plastic. These will be the ends of the tube. Secure one circle to one end with tape. Leave the other end open for now.
Stabilize the tube by adding a cardboard ring. This will keep the tube from rolling. Tape the ring around the middle of the tube.
Finally, attach the second plastic circle to the open end. Make sure it is tight. This will keep the colored paper pieces in place. Your kaleidoscope is ready to use.
Adding Decorative Finishes
Choose bright colors. Paint the exterior of your kaleidoscope. Use a small brush for details. Let each layer dry. Add patterns if you like. Stripes, dots, or swirls work well. Don’t forget to paint the ends. Use non-toxic paint. This keeps it safe for everyone.
Pick fun stickers. Place them on the kaleidoscope. Arrange them in a pattern. Mix big and small stickers. Add more for a unique look. Make it your own. Ensure they stick well. Smooth out any bubbles. Your kaleidoscope will look amazing.
Credit: m.youtube.com
Testing The Kaleidoscope
Adjust the tube to get a clear view. Move it closer or farther from your eye. You may need to turn the tube slightly. This helps align the patterns inside. Ensure the light is bright. Dim light makes it hard to see patterns. Try using a flashlight. This can make the colors pop.
Adjusting For Clear View
If the view is blurry, check the lens. Clean it with a soft cloth. Sometimes dust can block the view. Adjust the tube angle. A slight change can improve clarity.
Troubleshooting Common Issues
If you see no patterns, check the materials inside. They should move freely. Blocked objects can stop patterns. If colors look dull, add more colorful pieces. Bright colors work best. If the tube is loose, secure it with tape. A stable tube gives a better view.
Frequently Asked Questions
What Materials Do I Need To Make A Kaleidoscope?
You will need cardboard tubes, colored beads, plastic wrap, and transparent adhesive tape. These materials are easy to find and inexpensive.
Can I Make A Kaleidoscope Without Mirrors?
Yes, you can use reflective plastic sheets instead of mirrors. They are safer and easier to handle.
How Do I Assemble The Kaleidoscope?
Insert the reflective sheets into the cardboard tube. Then, add the colored beads and seal it with plastic wrap.
Is This Project Safe For Kids?
Yes, this project is kid-friendly. The materials used are safe, and there are no sharp objects involved.
Conclusion
Creating a kaleidoscope without mirrors is simple and fun. You just need a few materials and some creativity. Follow the steps to make your own unique design. Share this project with friends and family. It’s a great way to spend time together.
Enjoy the beautiful patterns you create. This activity is perfect for all ages. Try it today and see the magic unfold. Happy crafting!

My name is Carson Mackey and I specialize in mirror/glass. With over 8 years of experience in the glass/mirror industry, I am well-versed in all aspects of fabrication, repair and installation. I take great pride in providing my clients with the best quality of service and products. I am passionate about my work and strive to help my clients realize their vision.
Honestly, I am dedicated to providing the best services and products to my customers and I’m always open to learning new techniques and working with advanced materials. Basically, this is a place where I will share my thoughts and experiences on Mirror. And this website (http://mirrortopics.com) is an outlet of my deep passion for Mirror.
I want to clear about MirrorTopics that it’s not any agent or hired organization. It fully customize by me. So I hope, posted information will Realistic and authentic. Although I will do enough research before posting but if you notice any wrong or mistake on my article, please contact with me without any hesitation. As well as you can suggest me about content quality, authentication and so on by using our Contact US page. Thank you my friend to support me.