
Framing a builder-grade mirror is a simple project. It can add style to your bathroom.
Most homes have basic builder-grade mirrors. They are plain and lack character. But, you don’t have to live with them. You can frame them yourself. This project is cost-effective. It also adds a touch of elegance. Even a beginner can do it.
With the right tools and steps, your mirror will look stylish. In this guide, I will show you how to frame your builder-grade mirror. It’s easy and fun. Let’s get started!
Credit: homeandhallow.com
Introduction To Mirror Framing
Mirror framing is a simple way to upgrade your home decor. A framed mirror can change the look of any room. It adds style and elegance. Plus, it is a fun DIY project.
Importance Of A Framed Mirror
A framed mirror does more than reflect light. It creates a focal point in any room. Framed mirrors also add depth and dimension. This makes a space look larger and more open.
Furthermore, a framed mirror hides the mirror’s edges. This gives it a clean, finished look. It also protects the mirror from damage.
Benefits Of Diy Framing
DIY framing is budget-friendly. You can save money by framing your mirror yourself. Also, you get to choose the frame style and color. This means the frame can match your room’s decor perfectly.
Another benefit is the sense of accomplishment. Creating something with your own hands feels great. Plus, you learn new skills along the way. DIY projects also allow you to customize the frame size. This is useful if you have an odd-sized mirror.
| Benefit | Description |
|---|---|
| Cost-Effective | Save money by framing yourself. |
| Customization | Choose your own style and color. |
| Skill Building | Learn new DIY skills. |
| Unique Fit | Frame odd-sized mirrors easily. |
Here are some steps to start framing your builder grade mirror:
- Measure your mirror.
- Buy the frame materials.
- Cut the materials to size.
- Assemble the frame.
- Attach the frame to the mirror.
Gathering Materials
Framing a builder-grade mirror can elevate the look of any bathroom. Before you start, it’s crucial to gather all the necessary materials. This section will guide you through the essentials you need for this DIY project.
Essential Tools
Having the right tools makes the job easier and more efficient. Here is a list of essential tools you will need:
- Measuring tape
- Miter saw or miter box with a hand saw
- Sandpaper or sanding block
- Wood glue
- Liquid nails or construction adhesive
- Caulk and caulking gun
- Painter’s tape
- Paint or stain
- Paintbrush or foam brush
- Clamps
These tools will help you cut, assemble, and finish the frame.
Choosing The Right Frame
Selecting the right frame material is important for the overall look. Here are some popular options:
| Material | Benefits |
|---|---|
| Wood | Classic look, easy to paint or stain |
| Metal | Modern, sleek, and durable |
| Plastic | Lightweight, versatile, and affordable |
Consider the style of your bathroom when choosing the frame material. Make sure the material complements your existing decor.
By gathering these materials and tools, you will be well-prepared to start framing your mirror. Proper preparation ensures a smooth and successful DIY project.
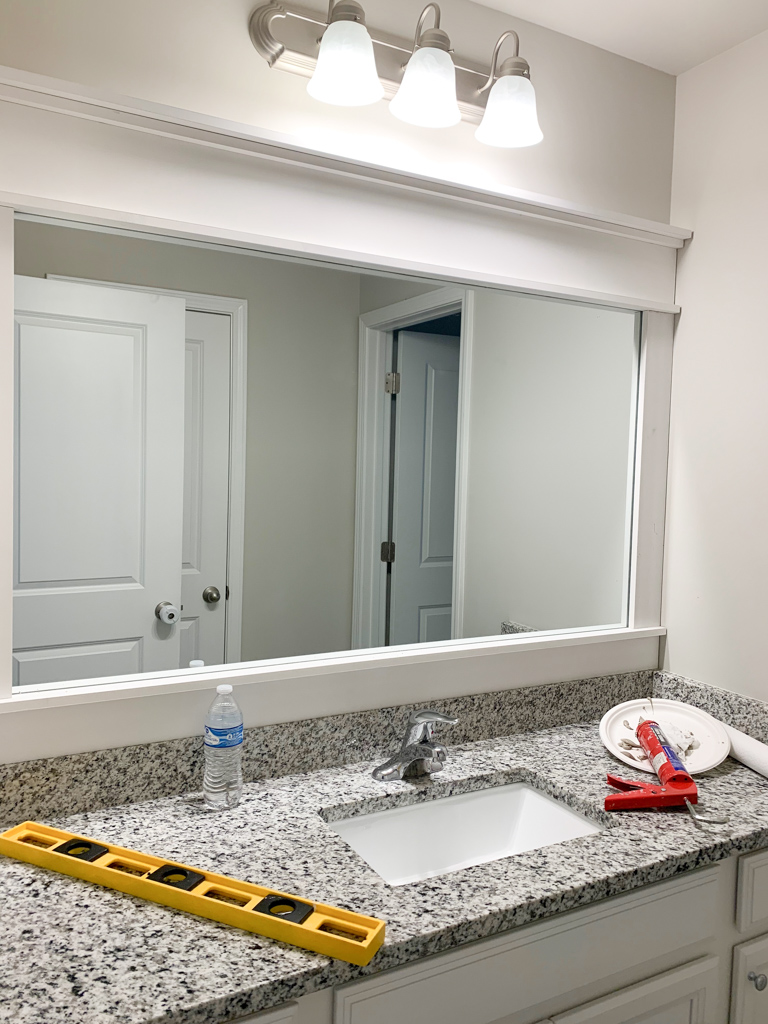
Preparing The Mirror
Before framing a builder-grade mirror, preparation is key. Ensuring the mirror is clean and accurately measured will make the framing process easier. Follow these steps to prepare your mirror for a beautiful frame.
Cleaning The Surface
First, clean the mirror thoroughly. Use a glass cleaner and a lint-free cloth. Spray the cleaner directly onto the cloth. Wipe the mirror in circular motions. This helps to avoid streaks. Ensure there are no smudges or dust particles left. A clean surface ensures the frame adheres well.
Measuring The Dimensions
Next, measure the mirror dimensions. Use a measuring tape for accuracy. Measure the height and width of the mirror. Write down these measurements. Double-check to ensure they are correct. Accurate measurements are crucial for a perfect fit. This will help you cut the frame pieces to the right size.

Credit: diyimhome.com
Cutting The Frame
Cutting the frame is a crucial step in creating a stunning framed mirror. Precise cuts ensure that the frame fits perfectly around your mirror. Follow these steps to achieve a professional look.
Selecting The Frame Style
First, choose a frame style that complements your decor. Wood and metal are popular choices. Wood frames can add warmth and charm. Metal frames offer a sleek, modern look. Pick a style that matches your room’s aesthetic.
Cutting To Size
Measure your mirror carefully. Note down the dimensions. Use a miter saw for accurate cuts. Set the saw to a 45-degree angle. Cut each piece of the frame to fit the mirror’s dimensions. Ensure all corners align perfectly.
Double-check your measurements before making any cuts. Mistakes can lead to gaps and uneven edges. Sand down the edges for a smooth finish. This will help in aligning the corners better. Once all pieces are cut, you are ready to assemble the frame.
Assembling The Frame
Assembling the frame for your builder grade mirror is an exciting step. This process involves a few key steps to ensure a perfect fit. It’s essential to take your time and follow each step carefully.
Joining The Corners
Start by laying out your frame pieces on a flat surface. Ensure each piece aligns correctly. Use a corner clamp to hold two pieces together. Apply wood glue to the edges where the pieces meet. Press them firmly together. Wipe away any excess glue with a damp cloth. Allow the glue to dry completely. Repeat this process for all corners.
Securing The Frame
Once the corners are dry, reinforce them with finishing nails. Use a nail gun or hammer to insert the nails. Place nails at an angle for extra strength. Make sure the nails are evenly spaced. You can fill any gaps with wood filler. Sand the frame to smooth out any rough spots. Paint or stain the frame to match your decor. Finally, attach the frame to the mirror with mirror adhesive.
Attaching The Frame To The Mirror
Attach the frame to the mirror using strong adhesive or brackets. Ensure the frame fits snugly around the mirror edges. Secure the frame carefully to avoid damaging the mirror.
Attaching the frame to your builder grade mirror is a crucial step. This process ensures your mirror has a polished and finished look. It also secures the frame in place, preventing any mishaps.Applying Adhesive
Start by applying a strong adhesive to the back of the frame. Use a caulking gun for easy application. Spread the adhesive evenly to ensure a solid bond. Avoid putting too much adhesive, as it can ooze out.Positioning The Frame
Carefully position the frame around the mirror. Ensure it aligns perfectly with the edges. Press the frame firmly against the mirror. Hold it in place for a few minutes. This helps the adhesive to set properly. Use painter’s tape to keep the frame steady while it dries. By following these steps, your mirror will have a beautiful, professional finish. “`Finishing Touches
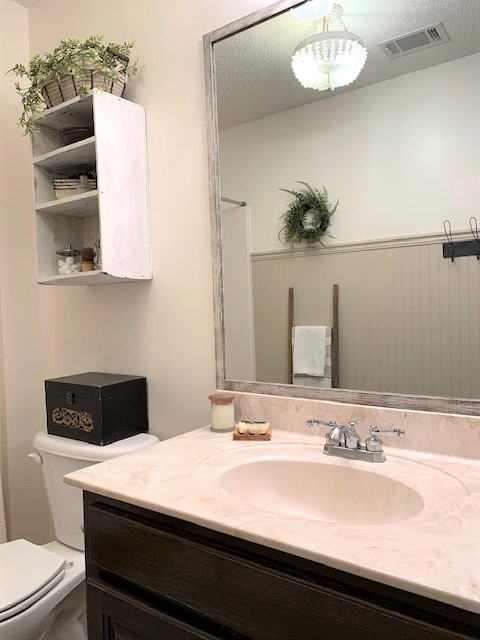
Framing a builder-grade mirror can transform its look. The finishing touches make all the difference. These final details ensure your mirror not only looks polished but also stays durable. Here, we will cover the crucial steps you need to take.
Sealing The Edges
Sealing the edges of your newly framed mirror is essential. This step protects the mirror and frame from moisture. Use a clear silicone sealant. Apply it evenly along the seams.
Let it dry completely. This prevents potential water damage. It also keeps the frame in place. It is a simple yet vital task. Skipping this can lead to problems down the road.
Adding Decorative Elements
Adding decorative elements can elevate your mirror’s appearance. Think about your room’s theme. Choose elements that complement the existing decor. You can use:
- Decorative moulding
- Beadboard
- Corner medallions
- Painting techniques
Decorative moulding adds elegance. Beadboard gives a rustic feel. Corner medallions create a classic look. Consider painting techniques to add texture. Use these to make the mirror unique.
Here is a quick guide:
| Element | Effect | Best for |
|---|---|---|
| Decorative moulding | Elegant finish | Traditional settings |
| Beadboard | Rustic charm | Country or cottage styles |
| Corner medallions | Classic touch | Formal settings |
| Painting techniques | Texture and depth | Modern or eclectic styles |
Choose wisely. These finishing touches will complete your framed mirror. It will become a standout piece in your home.
Credit: athomeinthewildwood.com
Caring For Your Framed Mirror
Framing a builder-grade mirror can transform a plain bathroom into a stylish space. But, to keep your framed mirror looking great, regular care is essential. Here are some tips to help you maintain its beauty and longevity.
Regular Maintenance
Dust your framed mirror regularly to prevent buildup. Use a microfiber cloth to avoid scratches. Clean the mirror with a glass cleaner. Spray the cleaner on the cloth, not directly on the mirror, to avoid drips and streaks. Wipe gently in circular motions for a streak-free shine.
Avoiding Damage
Prevent damage by keeping the frame dry. Water can cause the frame to warp or peel. If the frame gets wet, dry it immediately. Avoid using harsh chemicals near the frame. These can damage the finish or discolor the material. Be careful when hanging items near the mirror. Avoid bumping or scratching the frame.
Frequently Asked Questions
What Materials Are Needed To Frame A Mirror?
You’ll need wood trim, a saw, paint, adhesive, and a measuring tape. These materials are essential for framing a mirror.
How Do You Measure A Mirror For Framing?
Measure the height and width of the mirror. Add extra length for the frame. This ensures a perfect fit.
Can I Frame A Mirror Without Removing It?
Yes, you can. Use adhesive to attach the frame directly onto the mirror. It’s a simple process.
What Type Of Adhesive Should I Use?
Use a strong, mirror-safe adhesive. It ensures the frame sticks securely without damaging the mirror.
Conclusion
Framing a builder grade mirror can transform your space. It’s an easy, affordable project. With a few tools, you can create a stylish look. Choose a frame that matches your decor. Measure carefully and cut precisely. Attach the frame securely for a polished finish.
This project adds value and charm to your home. Try it yourself and enjoy the new look.

My name is Carson Mackey and I specialize in mirror/glass. With over 8 years of experience in the glass/mirror industry, I am well-versed in all aspects of fabrication, repair and installation. I take great pride in providing my clients with the best quality of service and products. I am passionate about my work and strive to help my clients realize their vision.
Honestly, I am dedicated to providing the best services and products to my customers and I’m always open to learning new techniques and working with advanced materials. Basically, this is a place where I will share my thoughts and experiences on Mirror. And this website (http://mirrortopics.com) is an outlet of my deep passion for Mirror.
I want to clear about MirrorTopics that it’s not any agent or hired organization. It fully customize by me. So I hope, posted information will Realistic and authentic. Although I will do enough research before posting but if you notice any wrong or mistake on my article, please contact with me without any hesitation. As well as you can suggest me about content quality, authentication and so on by using our Contact US page. Thank you my friend to support me.