
Drilling into a mirror sounds challenging, right? It can be done safely with the right steps.
Mirrors add elegance to any space, but installing them often requires drilling holes. This can seem daunting, especially if you’re worried about breaking the glass. Don’t worry! With the correct tools and techniques, you can drill into a mirror without any cracks or damage.
Understanding the process will help you feel more confident and achieve a professional result. In this guide, we’ll break down the steps and tips for drilling into a mirror. You’ll learn how to prepare, what tools you need, and how to execute the task smoothly. Let’s get started and make that mirror installation a breeze!

Credit: www.youtube.com
Introduction To Drilling Mirrors
Drilling into a mirror can seem like a daunting task. But with the right techniques and tools, it becomes manageable. This guide will help you understand the process and ensure you do it safely. Let’s dive into the details of drilling mirrors.
Importance Of Proper Techniques
Proper techniques ensure the mirror does not crack. They also keep you safe. Mirrors are fragile, and mishandling them can be dangerous. Using the right methods reduces the risk of accidents. It also ensures a clean, professional finish. Understanding these techniques is crucial for a successful project.
Tools And Materials Needed
Gathering the right tools and materials is the first step. You will need a power drill and a diamond-tipped drill bit. These are essential for drilling into glass. Safety gear is also important. Wear safety goggles and gloves to protect yourself. A spray bottle filled with water helps keep the drill bit cool. This prevents the mirror from overheating and cracking. Lastly, you will need masking tape to mark the drilling spot and reduce vibrations.

Credit: diy.stackexchange.com
Preparing The Mirror
Drilling into a mirror might seem tricky, but with the right preparation, it can be done safely and effectively. The first step is to prepare the mirror before you start drilling. This involves cleaning and marking the surface, and then securing the mirror properly. Let’s dive into each step in detail.
Cleaning And Marking The Surface
Start by cleaning the mirror thoroughly. Any dust or debris can cause the drill to slip. Use a mixture of water and vinegar for the best results. Dry the mirror completely with a soft cloth.
Next, you need to mark the spot where you will drill. Use a non-permanent marker to make a small dot. This will help you stay accurate. You can use a ruler to ensure the spot is exactly where you need it.
For added precision, place a piece of masking tape over the marked spot. This helps prevent the drill from slipping and cracking the mirror. Re-mark the spot on top of the tape for visibility.
Securing The Mirror Properly
Securing the mirror is crucial to prevent any damage. Place the mirror on a flat surface with a thick towel or rubber mat underneath. This will cushion the mirror and absorb vibrations.
If the mirror is large, get some help. Hold the mirror steady or use clamps to secure it. Be gentle; too much pressure can cause cracks.
Ensure the mirror is stable and does not move when you apply pressure. This will make the drilling process safer and more accurate.
| Step | Description |
|---|---|
| Cleaning the Surface | Use water and vinegar, then dry with a soft cloth. |
| Marking the Spot | Use a non-permanent marker and masking tape. |
| Securing the Mirror | Place on a flat surface with a towel or rubber mat. |
Following these steps will make drilling into a mirror much easier and safer. Take your time and work carefully to avoid any mishaps.
Choosing The Right Drill Bit
Drilling into a mirror requires precision and the right tools. Selecting the correct drill bit can make the process easier and safer. This section will guide you through the types of drill bits you need and how to choose the right size.
Types Of Drill Bits
There are several drill bits, but only a few are suitable for drilling into mirrors. Here are the most important types:
- Diamond Drill Bits: These are the best for drilling mirrors. They cut through glass and mirrors smoothly.
- Carbide-Tipped Drill Bits: These are durable and also work well on mirrors. They are a good alternative if you don’t have diamond drill bits.
Avoid using regular metal drill bits. They can break the mirror and cause damage.
Selecting The Appropriate Size
The size of the drill bit you choose is crucial. Here’s how to select the right one:
- Measure the hole you need. Use a ruler or measuring tape.
- Pick a drill bit that matches the diameter of the hole.
- If in doubt, start with a smaller bit. You can always make the hole bigger, but you can’t fix an oversized hole.
Using the correct size ensures a clean and precise hole in the mirror.
Choosing the right drill bit is the first step in drilling into a mirror. Follow these guidelines to ensure you select the best type and size for your project.
Setting Up The Workspace
Setting up your workspace correctly is crucial for drilling into a mirror. Proper preparation ensures safety and precision, minimizing the risk of cracks or breakage.
Ensuring Adequate Lighting
Good lighting is essential when working with mirrors. It allows you to see clearly and make precise marks.
- Use bright, even lighting to avoid shadows.
- Position a lamp directly over your work area.
- Ensure there are no glare spots on the mirror.
Consider using a headlamp for additional light. This helps illuminate the exact spot you are drilling.
Minimizing Vibrations
Vibrations can cause the mirror to crack. Reduce vibrations by securing the mirror and using padding.
- Place the mirror on a soft, flat surface.
- Use foam or a towel underneath to absorb vibrations.
- Ensure the mirror is stable and does not move.
Clamp the mirror gently if needed. Do not overtighten to avoid pressure cracks.
| Task | Details |
|---|---|
| Lighting | Bright, even, no shadows |
| Surface | Soft, flat, padded |
| Stability | Clamped gently, no movement |
By following these steps, your workspace will be well-prepared for drilling into a mirror. Remember, preparation is key to a smooth and successful drilling process.
Drilling Process
The drilling process can seem intimidating, but with the right steps, it’s manageable. Drilling into a mirror requires patience, precision, and the right tools. This guide will help you understand the key steps involved in the drilling process.
Starting With A Pilot Hole
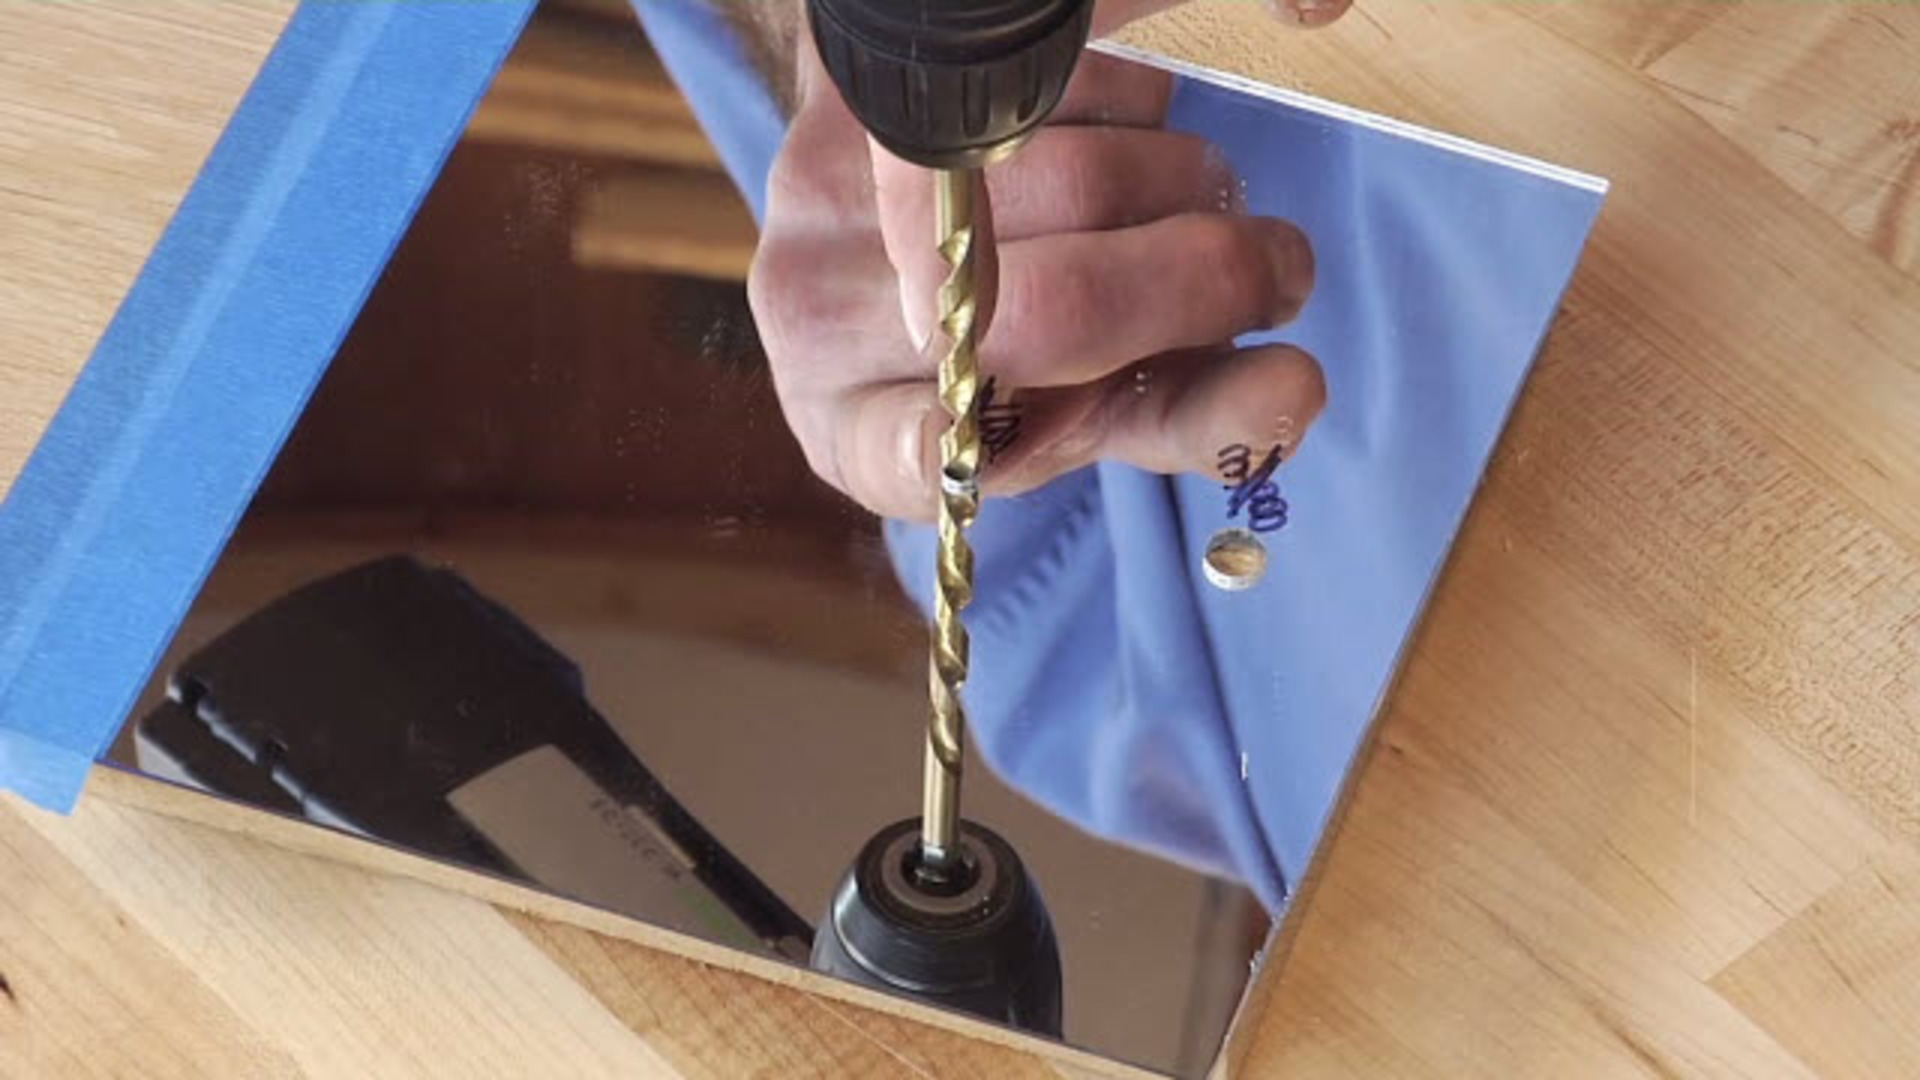
A pilot hole is essential for drilling into a mirror. It helps to guide the drill bit and prevent cracks. To create a pilot hole, use a small diamond-tipped drill bit. Mark the spot where you want to drill with a marker. Place a piece of masking tape over the mark to prevent slipping.
Start drilling at a low speed. Hold the drill steady and apply gentle pressure. Keep the drill perpendicular to the surface. This ensures a clean, accurate hole. Once the pilot hole is made, you can proceed with the final drill size.
Applying Steady Pressure
When drilling into a mirror, steady pressure is crucial. Too much pressure can cause the mirror to crack. Too little pressure can make the process slow and uneven. Begin with a slow speed and gradually increase it as needed.
Hold the drill firmly but gently. Allow the drill bit to do the work. Use a spray bottle to keep the drill bit and mirror cool. This helps to prevent overheating and damage to the mirror.
Keep your hands steady and maintain a consistent angle. This ensures a smooth and precise hole. Once you have drilled through the mirror, stop the drill and remove it carefully.
Remember, patience and precision are key. Follow these steps, and you will achieve a clean, professional result.
Credit: www.wwgoa.com
Cooling Techniques
Drilling into a mirror can be tricky. The glass heats up quickly, which risks cracking or breaking. Cooling techniques help keep the drill bit and mirror cool. This ensures a clean, smooth hole without damage.
Using Water To Cool The Bit
Water is a simple yet effective cooling method. It absorbs heat from the drill bit. Here’s how to use water:
- Fill a spray bottle with water.
- Spray water on the drilling spot.
- Keep spraying while you drill.
Water cools the bit and reduces friction. This prevents the mirror from overheating. It also keeps the drill bit sharp and functional longer.
Preventing Overheating
Overheating is a major risk. It can cause cracks or breaks. Preventing overheating ensures a clean hole. Follow these steps:
- Pause frequently to let the drill bit cool.
- Use low speed settings on your drill.
- Apply light pressure to avoid excessive heat.
Frequent pauses help distribute heat evenly. Low speed reduces friction, keeping the bit cool. Light pressure avoids pushing too hard, which can cause heat buildup.
By using water and preventing overheating, you protect your mirror. These cooling techniques ensure a smooth, clean drilling process.
Finishing Touches
After drilling into a mirror, the final steps are crucial. They ensure your project looks professional and is safe to handle. Let’s go through the necessary finishing touches to achieve the best results.
Smoothing The Edges
Smoothing the edges of the drilled hole is essential. It prevents any sharp fragments from causing injuries. Here’s how:
- Use a fine-grit sandpaper designed for glass. Wrap it around a small cylindrical object.
- Gently sand the edges of the hole. Move the sandpaper in a circular motion.
- Check for any rough spots. Continue sanding until the edges feel smooth.
Ensure you wear protective gloves. Sanding glass can produce fine dust.
Cleaning Up Residue
After drilling and sanding, residue can mar the surface. Cleaning up is the last step to restore clarity. Follow these steps:
- Use a soft cloth to wipe away any dust around the hole.
- Mix a solution of water and a few drops of glass cleaner.
- Dip a clean cloth into the solution and gently clean the mirror surface.
- Dry the area with a separate, dry cloth to prevent streaks.
For stubborn residue, a cotton swab can help. Dip it in the cleaning solution and target the specific area.
These finishing touches will ensure your mirror looks pristine. Safety and appearance go hand in hand. Enjoy your finished project!
Safety Precautions
Drilling into a mirror can be risky. Safety should be your top priority. Follow these safety precautions to protect yourself and others.
Wearing Protective Gear
Always wear protective gear when drilling into a mirror. This includes:
- Safety goggles to protect your eyes from glass shards
- Gloves to protect your hands from cuts
- Long sleeves to protect your arms
Ensure your gear fits well. Loose clothing can catch in the drill.
Handling Broken Glass
Broken glass can be dangerous. Handle it with care to avoid injury.
- Use a broom and dustpan to collect large pieces.
- Use a wet cloth to pick up small shards.
- Dispose of broken glass in a thick, sealed bag.
Keep children and pets away from the area until it is clean.
Frequently Asked Questions
How Do You Drill A Hole In A Mirror?
To drill a hole in a mirror, use a diamond drill bit. Start with a slow speed and apply light pressure. Keep the drill bit cool by using water or lubricant.
What Tools Are Needed To Drill A Mirror?
You need a diamond drill bit, a drill, masking tape, and water or lubricant. These tools help to ensure a clean and safe drilling process.
Can You Drill A Mirror Without Breaking It?
Yes, you can drill a mirror without breaking it. Use a diamond drill bit, apply gentle pressure, and keep the drill bit cool to avoid cracks.
Why Use A Diamond Drill Bit For Mirrors?
A diamond drill bit is essential for mirrors. It is designed to cut through glass without shattering it, ensuring a clean hole.
Conclusion
Drilling into a mirror can seem daunting, but it’s doable. Follow the steps carefully. Use the right tools. Take your time. Safety is crucial. Protect your eyes and hands. Remember, practice makes perfect. With patience and precision, you can achieve great results.
Happy drilling!

My name is Carson Mackey and I specialize in mirror/glass. With over 8 years of experience in the glass/mirror industry, I am well-versed in all aspects of fabrication, repair and installation. I take great pride in providing my clients with the best quality of service and products. I am passionate about my work and strive to help my clients realize their vision.
Honestly, I am dedicated to providing the best services and products to my customers and I’m always open to learning new techniques and working with advanced materials. Basically, this is a place where I will share my thoughts and experiences on Mirror. And this website (http://mirrortopics.com) is an outlet of my deep passion for Mirror.
I want to clear about MirrorTopics that it’s not any agent or hired organization. It fully customize by me. So I hope, posted information will Realistic and authentic. Although I will do enough research before posting but if you notice any wrong or mistake on my article, please contact with me without any hesitation. As well as you can suggest me about content quality, authentication and so on by using our Contact US page. Thank you my friend to support me.