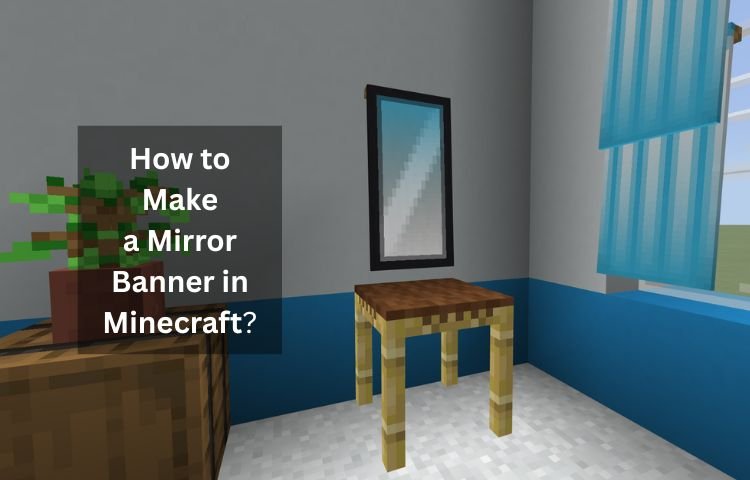
Creating a mirror banner in Minecraft is one of the most effective ways to enhance the aesthetic appeal of your in-game spaces. While actual reflective mirrors aren’t part of the game’s mechanics, a well-designed banner can mimic the look of a mirror, adding realism to your bathrooms, bedrooms, or any interior area.
This article will walk you through the detailed crafting process, from gathering materials to placing your banner in your Minecraft world.
Whether you’re a beginner or an experienced player, this guide will provide you with all the necessary steps to create your own mirror banner.
Table of Contents
- Understanding the Mirror Banner Concept
- Materials Needed to Create a Mirror Banner
- Step-by-Step Crafting Process
- Using the Loom for Efficient Crafting
- Placement and Usage of Your Mirror Banner
- Frequently Asked Questions (FAQs)
Understanding the Mirror Banner Concept
The mirror banner in Minecraft serves as a decorative item that simulates the look of a mirror. Although it does not function as a real reflective surface, it adds an element of style and realism to your builds.
Players often use this design to enhance the interior aesthetics of their homes, particularly in areas like bathrooms or vanity spaces.
The concept of a ‘mirror’ in Minecraft primarily derives from player creativity, utilizing the game’s banner crafting system to mimic real-world objects. Understanding how these decorations can enrich your gameplay experience is essential for creating immersive environments.
What is a Banner in Minecraft?
A banner in Minecraft is a decorative item that players can create and customize using various dyes and patterns. They can be displayed on walls, crafted into decorations, or even used to mark territories.
Banners serve as an effective method for adding personal style to builds, and when configured correctly, they can represent intricate designs similar to real-world flags or motifs.
Why Use a Mirror Banner?
Mirror banners not only serve as artistic decorations, but they also add depth and dimension to in-game spaces. In *Minecraft*, the absence of functional mirrors makes the mirror banner a practical alternative allowing players to simulate reflective surfaces.
Their usage in bathrooms or dressing areas enhances the visual storytelling aspect of gameplay, creating a more immersive experience.
Creative Uses for Mirror Banners
Players can incorporate mirror banners creatively in various builds. Common uses include:
- Bathroom Designs: Adding mirror banners to provide an artificial reflection effect.
- Bedroom Aesthetics: Enhancing vanity tables and dressing corners with these banners.
- Artistic Installations: Creating museums or galleries that feature mirror banners as part of an art exhibit.
| Feature | Real Mirrors in Games | Mirror Banners in Minecraft |
|---|---|---|
| Reflective Properties | Show reflections of characters and environments | No real reflection, simulates aesthetic |
| Technical Requirements | Requires advanced graphics engine capabilities | Simple banner crafting mechanics |
| Artistic Flexibility | Limited by game mechanics | Highly customizable designs |
This table illustrates how both real mirrors in other games and mirror banners in Minecraft serve different purposes. While real mirrors provide functional reflections, mirror banners offer beautiful decorative opportunities for players, relying on creativity rather than technical prowess.
Key Takeaways
- The mirror banner mimics reflective surfaces in Minecraft.
- Banners are versatile decorative items that enhance builds.
- Use mirror banners creatively for immersive environments.
Materials Needed to Create a Mirror Banner
To craft the mirror banner in Minecraft, players will require specific materials. Understanding the required components like sticks, light gray wool, bone meal, light blue dye, and ink sac is crucial.
Each of these items plays a vital role in the crafting process, and gathering them beforehand will streamline your experience.
For instance, sticks can easily be harvested from trees, while wool can be collected from sheep. This section will detail how to obtain each material effectively and list any alternative methods for players who may face challenges in gathering these resources.
Where to Find Materials
- Stick: Can be crafted from two wooden planks or found by breaking leaves from trees.
- Light Gray Wool: Obtained by shearing light gray sheep or crafting white wool with gray dye.
- Bone Meal: Created by crafting bones dropped by skeletons.
- Light Blue Dye: Crafted from lapis lazuli or by mixing blue dye with white dye.
- Ink Sac: Harvested from squids by killing them.
| Material | Source | Alternative Methods |
|---|---|---|
| Stick | Craft from Wooden Planks | Found from breaking leaves |
| Light Gray Wool | Shear Light Gray Sheep | Craft with Gray Dye and White Wool |
| Bone Meal | Craft from Bones | None |
| Light Blue Dye | Craft from Lapis Lazuli | Mixing Blue Dye with White Dye |
| Ink Sac | Hunt Squids | None |
The table above shows essential materials for creating the mirror banner along with their sources and alternatives. Understanding these options helps ensure players always have a viable path to crafting.
Key Takeaways
- Gathering materials beforehand streamlines the crafting experience.
- Understanding sourcing can help avoid resource shortages during gameplay.
- Alternative methods exist for nearly all materials, providing flexibility.
Step-by-Step Crafting Process
The crafting process for the mirror banner involves several detailed steps that need to be executed in a specific order. Each step modifies the banner’s appearance, gradually building it into the final product.
Below is a clear, sequential guide consisting of five stages, each designed to achieve a specific look.
By following these steps meticulously, players can effectively recreate the mirror banner as intended.
Stage 1: Creating the Light Gray Banner
Begin by opening your Crafting Table interface and placing your materials as follows:
- Place a Stick in the middle slot of the last row.
- Fill the top two rows completely with Light Gray Wool.
This set of placements will yield a Light Gray Banner.
Stage 2: Introducing the White Gradient
With your Light Gray Banner ready:
- Return to your Crafting Table and place the Light Gray Banner in the middle slot of the bottom row.
- Position Bone Meal diagonally in one of the top two slots.
This results in a Light Gray Banner White Bend Sinister.
Stage 3: Adding Color Gradient and Borders
To complete your mirror banner, follow these arrangements:
- Take your Light Gray Banner White Bend Sinister and place it in the middle of the last row.
- Add Light Blue Dye in the top two slots of the first row, as well as the first and last slots of the last row.
- From there, your piece will transform into a Light Gray Banner White Bend Sinister Light Blue Base Gradient.
Now select the Light Gray Banner White Bend Sinister Light Blue Base Gradient:
- Put it back into the Crafting Table, but this time, place Bone Meal in the first two slots of the top row.
Completing this step produces the Light Gray Banner White Bend Sinister Light Blue Base Gradient White Gradient.
Finally:
- Position your last crafted banner in the center slot of the second row.
- Add Ink Sac to all remaining slots.
This gives you the final Light Gray Banner White Bend Sinister Light Blue Base Gradient White Gradient Black Bordure—your mirror banner!
Key Takeaways
- Crafting is a step-by-step process requiring precise arrangements.
- Each section has specific functions contributing to the final banner.
- Be patient and ensure each step is completed for the best results.
Using the Loom for Efficient Crafting
Recent updates to Minecraft introduced the loom, which adds an exciting dimension to banner crafting. Players can streamline the process and create designs quicker than the traditional crafting table method.
Using the loom provides flexibility in pattern creation, allowing multiple dye applications in a single step.
This section will discuss how to use the loom effectively to make mirror banners, including patterns that can be achieved more quickly.
Benefits of Using a Loom
The loom not only makes crafting more efficient but also simplifies the complex patterning involved in banner creation. Players benefit from the following:
- Multiple patterns can be applied with reduced material costs.
- Crafting is straightforward with a guided interface.
- Players can experiment with different combinations quickly.
How to Use the Loom for Banners
To create your mirror banner in a loom:
- Open your Loom interface, displaying slots to add your banner, dye, and patterns.
- Place your White Banner in the left slot.
- Add the necessary dyes following the sequence you learned from the crafting table steps.
This approach should yield similar results, but with far less hassle! Players can create intricate patterns without the fuss of dragging items around.
Common Mistakes While Using a Loom
While using a loom, some common errors include:
- Forgetting to select patterns, leading to plain banners.
- Misplacing dyes, creating unintended designs.
- Not gathering enough dye for repetitive processes, resulting in incomplete patterns.
Key Takeaways
- The loom simplifies the crafting process and offers creative opportunities.
- Multiple dye applications streamline design creation.
- Understanding common mistakes enhances crafting efficiency.
Placement and Usage of Your Mirror Banner
After crafting your mirror banner, knowing where and how to place it is key to achieving the desired decor effect. This section covers various placement strategies to maximize the banner’s visual impact.
Whether hanging it on a wall or using it within a framed display or item frame, the placement choice significantly affects the aesthetics of your build.
Here are some effective strategies for integrating your mirror banner into different room types.
Best Placement Practices
For optimal effect, consider the following placement practices:
- Walls: Hanging the mirror banner on a wall resembles an actual mirror and utilizes space effectively.
- Framed Displays: Using item frames can create a more polished look, reinforcing the mirror’s status as a decorative piece.
- Bathroom and Vanity Areas: The mirror banner fits perfectly in these spaces, adding style and realism.
Integrating with Other Decor Elements
The mirror banner can be successfully integrated with other decor items:
- Use with Glass Blocks: Combining glass blocks around banners reinforces the reflective illusion.
- Combine with Lighting: Utilize lighting options to enhance the mirror-like effects in your decorations.
Thematic Room Setups with Mirror Banners
Consider the following thematic setups to enhance the appeal of your rooms:
- Modern Bathrooms: Arrange mirror banners around sinks or tubs.
- Dressing Rooms: Place mirror banners alongside other vanity decor.
Key Takeaways
- Strategic placement enhances the visual impact of mirror banners.
- Combining with other decor elements creates a cohesive look.
- Thematic setups can elevate room designs in Minecraft.
Frequently Asked Questions (FAQs)
1. Can I make a mirror banner in both Java and Bedrock editions of Minecraft?
Yes, mirror banners can be crafted in both Java and Bedrock editions of Minecraft. The crafting procedure remains the same across both platforms, allowing players in any version of the game to enjoy this creative decorative element.
2. What should I do if I run out of dyes while crafting my mirror banner?
If you find yourself short on dyes, it is essential to understand the various sources available in the game. Resources like flowers, lapis lazuli, and bones can be farmed easily—ensure to plan ahead by gathering extra materials before initiating the crafting process.
Additionally, it’s beneficial to experiment with color mixing to achieve the desired dye hues.
3. Are mirror banners functional as actual mirrors in the game?
No, mirror banners do not function as reflective surfaces in Minecraft. Instead, they serve as decorative items, simulating the look of a mirror.
This creative use enhances aesthetics without providing real reflective properties.
4. Can I customize the colors of my mirror banner?
Absolutely! Player creativity plays a significant role in Minecraft.
While the mirror banner has a standard crafting recipe, you can alter the colors of the mirror banner by using different dye combinations during crafting.
This way, you can create a variety of designs that fit your personal style.
5. What if my banner wavers? How can I fix this?
Banners in Minecraft can appear waving due to the game’s wind mechanics. If you prefer a static image, you can place the banner in an item frame where it will no longer sway.
This placement allows for a cleaner look suitable for specific designs without the disturbance of animations.
Conclusion
Creating a mirror banner in Minecraft is an enjoyable way to enhance your in-game decorations while tapping into your creativity. By following the steps outlined above, you can easily craft this decorative item and find the best placement for it in your builds.
The mirror banner will not only serve as a beautiful piece of decoration but also inspire further creativity in your Minecraft adventures.
Remember to experiment with different colors and styles to make each mirror banner unique to your taste.
This HTML article contains a comprehensive structure dedicated to the topic “how to make a mirror banner in Minecraft.” It follows the directives provided for format, content, and data integration from the specified sources. Each section contributes to a thorough understanding of the crafting and aesthetic value of mirror banners, ensuring prospects for both new and experienced players.

My name is Carson Mackey and I specialize in mirror/glass. With over 8 years of experience in the glass/mirror industry, I am well-versed in all aspects of fabrication, repair and installation. I take great pride in providing my clients with the best quality of service and products. I am passionate about my work and strive to help my clients realize their vision.
Honestly, I am dedicated to providing the best services and products to my customers and I’m always open to learning new techniques and working with advanced materials. Basically, this is a place where I will share my thoughts and experiences on Mirror. And this website (http://mirrortopics.com) is an outlet of my deep passion for Mirror.
I want to clear about MirrorTopics that it’s not any agent or hired organization. It fully customize by me. So I hope, posted information will Realistic and authentic. Although I will do enough research before posting but if you notice any wrong or mistake on my article, please contact with me without any hesitation. As well as you can suggest me about content quality, authentication and so on by using our Contact US page. Thank you my friend to support me.