Drawing a mirror reflection can be challenging yet rewarding. It’s a great skill for artists.
Learning how to draw a mirror reflection helps enhance your drawing techniques. It requires understanding light, angles, and symmetry. Whether you are a beginner or an experienced artist, mastering this skill can add realism to your artwork. Imagine being able to draw a character looking into a mirror, with all the details perfectly reflected.
This guide will walk you through the steps needed to achieve that effect. You will learn key concepts and practical tips to make your mirror reflections look convincing and lifelike. Get ready to improve your artistic abilities and add a new dimension to your drawings!

Credit: jonamdall.com
Introduction To Mirror Reflections
Drawing a mirror reflection can seem like a daunting task. But it is a valuable skill for any artist. Mirror reflections add depth and realism to your art. They make the scene come alive. Understanding how to draw them correctly can enhance your artwork.
Why Mirror Reflections Are Important
Mirror reflections play a crucial role in many artworks. They help create a sense of space. They also add realism to the scene. Including mirror reflections can show off your attention to detail. It can also demonstrate your understanding of light and perspective.
Here are a few reasons why mirror reflections are important:
- Realism: Reflections make the scene more believable.
- Depth: They add layers to your artwork.
- Detail: Showcases your skill and precision.
Common Challenges In Drawing Reflections
Drawing reflections can be tricky. There are several common challenges artists face:
- Perspective: Reflections must match the perspective of the scene.
- Accuracy: The reflection should mirror the object exactly.
- Lighting: Light and shadows need to be consistent in the reflection.
Addressing these challenges requires practice and observation. Pay close attention to real-life reflections. Note how light interacts with surfaces. Observe how objects change when seen in a mirror.
By understanding these aspects, you can improve your skills. You will be able to draw convincing mirror reflections with practice.
Materials Needed
Creating a mirror reflection in your drawing can be very rewarding. To get started, you need the right materials. Let’s explore the essential tools and how to choose the right paper.
Essential Drawing Tools
To draw a mirror reflection, you need specific tools. Here are the essentials:
- Pencils: Use a range of pencils, from hard (H) to soft (B).
- Eraser: A kneaded eraser works best for subtle corrections.
- Ruler: Essential for drawing straight lines and accurate angles.
- Blending Stumps: Useful for creating smooth, realistic shadows.
- Sharpener: Keep your pencils sharp for detailed work.
Choosing The Right Paper
The type of paper you use impacts your drawing quality. Here are some tips:
- Weight: Choose paper with a weight of at least 80 lbs.
- Texture: Smooth paper is ideal for detailed work and shading.
- Size: A larger paper gives you more space to work with reflections.
Using the right materials can make your drawing process smoother and more enjoyable. Gather these tools, and you’ll be ready to draw a stunning mirror reflection.
Understanding Light And Reflection
Grasping the concept of light and reflection is essential for drawing mirror reflections. Light behaves in specific ways when it hits different surfaces, influencing how reflections appear. This section explores the interaction between light and surfaces, and the science behind mirror reflections.
How Light Interacts With Surfaces
Light interacts with surfaces in various ways. These interactions include absorption, transmission, and reflection. Each type of interaction affects how we perceive objects. Absorption means the surface takes in the light, making it appear dark. Transmission allows light to pass through, like with glass.
Reflection occurs when light bounces off a surface. The angle at which light hits the surface (the angle of incidence) determines the angle at which it reflects (the angle of reflection). This principle is key to understanding mirror reflections.
| Interaction Type | Description |
|---|---|
| Absorption | Light is taken in by the surface |
| Transmission | Light passes through the surface |
| Reflection | Light bounces off the surface |
The Science Behind Mirror Reflections
Mirrors create reflections by bouncing light back at a consistent angle. This is due to their smooth, shiny surface. The smoothness ensures that the angle of incidence equals the angle of reflection. This consistency creates a clear, accurate reflection.
To draw a mirror reflection, understand that the reflected image is a reversed copy of the original. It appears as if the image is placed behind the mirror. This is because the light paths seem to originate from behind the mirror. By keeping these principles in mind, you can create realistic mirror reflections in your drawings.
- Angle of incidence = angle of reflection
- The image is reversed
- Light paths appear from behind the mirror
These fundamental concepts of light and reflection are crucial. They will help you draw accurate and realistic mirror reflections.
Basic Shapes And Symmetry
Learning how to draw a mirror reflection can be a fun and rewarding experience. The key lies in mastering basic shapes and symmetry. By understanding these concepts, you can create accurate and realistic reflections. Whether drawing a simple geometric shape or a more complex object, symmetry plays a crucial role in achieving the desired effect.
Drawing Simple Geometric Shapes
Start with simple shapes like circles, squares, and triangles. These are easy to draw and understand. To draw a circle, place your pencil at a central point and move it evenly around. For a square, draw four equal straight lines, connecting at right angles. Triangles can be drawn by connecting three points with straight lines.
Here’s a basic table to help you visualize the steps:
| Shape | Steps |
|---|---|
| Circle | 1. Start at center 2. Move pencil evenly around |
| Square | 1. Draw four equal lines 2. Connect at right angles |
| Triangle | 1. Connect three points 2. Use straight lines |
Creating Symmetrical Reflections
Symmetry is essential for drawing mirror reflections. Imagine a line dividing your object into two equal halves. Each half should mirror the other. This line is called the axis of symmetry. To create symmetrical reflections, draw the basic shape first. Then, replicate it on the other side of the axis.
Follow these steps for symmetrical reflections:
- Draw the basic shape.
- Identify the axis of symmetry.
- Replicate the shape on the other side.
Practice with different shapes to get better. Symmetry can be tricky, but with practice, it becomes easier.
Remember, the key to success is practice. Keep drawing, and soon you will master mirror reflections.
Drawing The Mirror
Drawing a mirror reflection can be a fun and rewarding experience. It adds depth and realism to your art. The key steps involve sketching the outline and adding details to the frame. Let’s dive into each step.
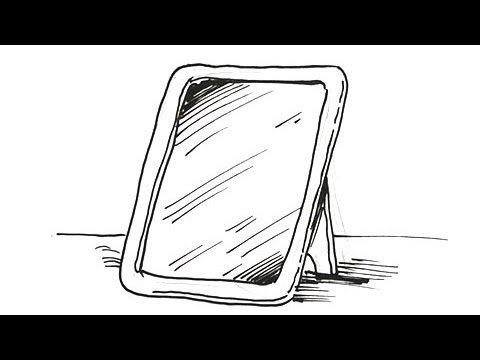
Sketching The Outline
Start by sketching a simple rectangle or oval shape. This will be the basic outline of the mirror. Make sure your lines are light so you can easily erase any mistakes.
Next, draw a line down the center of the shape. This line helps you create a symmetrical reflection. Divide the mirror into two equal halves.
Now, lightly sketch the reflection you want to show. Remember, the reflection should be a mirror image of what you see outside the frame. Pay attention to the proportions and angles.
Adding Details To The Frame
Once the outline is ready, start adding details to the mirror frame. The frame can be simple or ornate, depending on your style.
To create a simple frame, draw a narrow border around the outline. You can add small designs or patterns to make it more interesting.
For an ornate frame, you can add more intricate designs. Think about using curves, floral patterns, or even geometric shapes. Take your time to make the details look neat and precise.
Finally, add some shading to give the frame a three-dimensional look. Lightly shade the areas where the light would not hit directly. This creates a sense of depth and realism.
| Step | Action |
|---|---|
| 1 | Sketch a simple rectangle or oval shape. |
| 2 | Draw a line down the center of the shape. |
| 3 | Lightly sketch the reflection within the frame. |
| 4 | Add details to the frame, simple or ornate. |
| 5 | Shade the frame for a three-dimensional look. |
Following these steps will help you draw a realistic mirror reflection. Have fun and experiment with different frame styles!

Credit: jonamdall.com
Creating The Reflected Image
Creating a reflected image can be a fun and rewarding task. Drawing reflections can add depth and realism to your artwork. It requires careful observation and attention to detail. This guide will help you with the process step by step.
Positioning The Subject
Start by deciding where your subject will be. Place it in front of the mirror. Make sure you have a clear view of both the subject and its reflection. This will make your work easier. Observe the angle and distance from the mirror. These factors affect how the reflection appears. Notice any distortions caused by the mirror’s surface. Take your time to study these details.
Sketching The Reflection
Begin by drawing the main subject. Ensure that it is properly positioned. Next, focus on the reflection. Use light lines to sketch the reflected image. Pay attention to the angles and proportions. The reflection should mirror the subject accurately. Remember, objects closer to the mirror appear larger in the reflection. Objects further away appear smaller. Use reference points to guide your sketch. Look for lines and shapes that match between the subject and its reflection. Adjust your drawing as needed. This will help in achieving a realistic reflection.
Add details to both the subject and its reflection. Be consistent with the light and shadows. These elements will enhance the sense of realism. Take your time to refine the drawing. Make sure the reflection aligns correctly with the subject.
Adding Depth And Dimension
Adding depth and dimension to a mirror reflection can make your drawing more realistic. It requires careful attention to details and techniques that mimic the real world. This section will guide you through the essential steps to enhance your mirror reflection drawing, focusing on shading techniques and using highlights and shadows.
Shading Techniques
Shading is crucial for creating depth. Use light and dark tones to represent different areas of your mirror reflection. Start with a light sketch. Gradually build up the shadows. Pay attention to the light source. This will guide where the shadows fall.
Use a range of pencils. Softer pencils create darker shades. Harder pencils are good for lighter areas. Blend the shading smoothly. This avoids harsh lines and creates a more natural look. Practice different shading techniques to improve your skill.
Using Highlights And Shadows
Highlights and shadows add dimension to your drawing. Identify the areas where the light hits directly. These spots will be the brightest. Use an eraser to create these highlights. This technique gives the illusion of light reflecting off the surface.
Shadows are equally important. They show where the light does not reach. Use darker tones to create these areas. Blend the edges of the shadows. This makes them look softer and more realistic. Keep practicing to perfect this balance between light and shadow.
Final Touches
The final touches on your mirror reflection drawing can make a big difference. This stage is about refining details and correcting any mistakes. Follow these tips to make your artwork look more realistic and polished.
Refining The Details
Examine your drawing closely. Check if the lines and shapes are clean and precise. Pay attention to small elements like:
- Edges of the mirror
- Reflected objects
- Shadows and highlights
Use a fine-tip pencil or eraser to refine edges. This helps create a sharp look. Add more shading to areas that need depth. Lightly blend the shadows for a smooth transition. Reflective surfaces should have a clear contrast between dark and light areas.
Correcting Mistakes
Mistakes are common and easy to fix. Identify any errors in your drawing. Look for:
- Misaligned objects
- Incorrect proportions
- Uneven shading
To correct these, use a soft eraser to lighten or remove areas. Redraw with careful attention to alignment and proportion. If shading is uneven, blend it with a blending stump or cotton swab. This technique ensures a smooth and realistic appearance.
Remember, small adjustments can greatly improve your drawing. Take your time and enjoy the process of bringing your mirror reflection to life.
Practice Exercises
Practicing how to draw mirror reflections can boost your drawing skills. It helps you understand light, shadow, and perspective better. This section offers practice exercises to hone your skills. Start with simple reflections and move to complex scenarios. Let’s dive in!
Simple Reflections
Start with drawing basic shapes. Draw a square and its mirror reflection. Place a vertical line between them as the mirror. Ensure the reflection mirrors the original shape. Practice this with circles, triangles, and rectangles. Focus on accuracy and symmetry.
Next, try reflecting simple objects. Draw a cup or a book and its reflection. Remember to keep the proportions the same. Practice daily to improve your precision.
Complex Scenarios
Move to more detailed objects. Draw a face and its reflection in a mirror. Pay attention to the features and their mirrored positions. This will challenge your observation skills.
Then, practice reflecting entire scenes. Draw a room with furniture and its mirror reflection. Focus on the angles and perspectives. This exercise will enhance your spatial awareness.
Lastly, try reflecting objects with different light sources. Draw a candle and its reflection with a light source. Notice how light and shadows change in the reflection. This will deepen your understanding of light behavior.
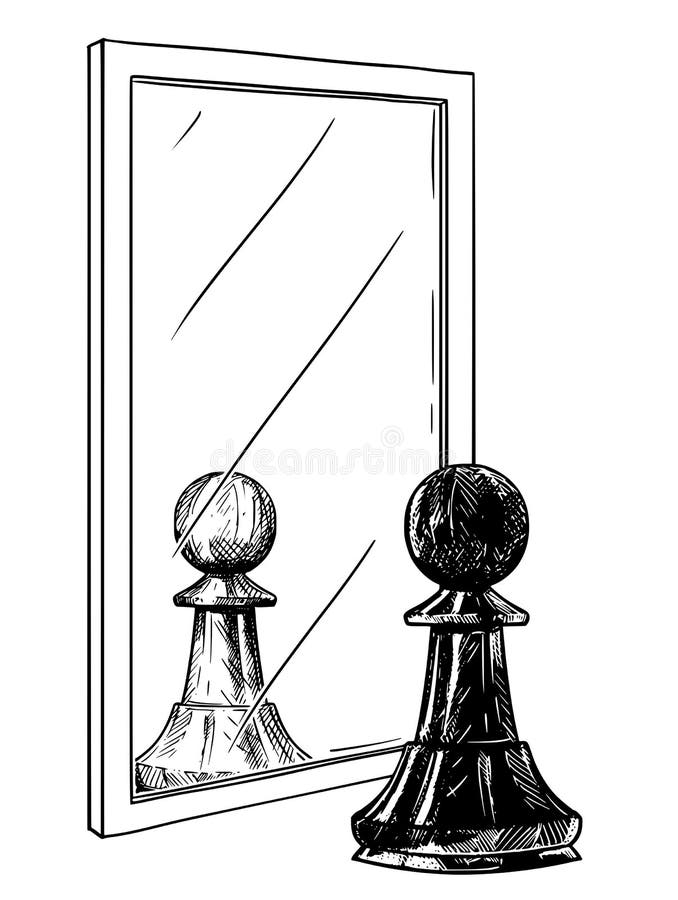
Credit: www.dreamstime.com
Frequently Asked Questions
How Do You Draw A Mirror Reflection?
To draw a mirror reflection, start by sketching the object. Then, duplicate the object in reverse, maintaining the same distance from the mirror line. Add details and shading to enhance realism.
What Are The Key Steps In Mirror Reflection Drawing?
The key steps are sketching the object, duplicating it in reverse, maintaining distance, and adding details. Ensure the reflected object mirrors the original accurately.
What Tools Do You Need For Drawing Reflections?
You need pencils, erasers, rulers, and paper. Optional tools include colored pencils or markers for added detail and shading.
How Do You Ensure Accuracy In Mirror Reflections?
Ensure accuracy by keeping consistent distances from the mirror line. Use a ruler for precise measurements and angles.
Conclusion
Creating realistic mirror reflections can be easy and fun. Practice often to improve your skills. Pay attention to light and angles. Use a reference if needed. Drawing reflections enhances your artwork’s depth. Keep experimenting and learning. Enjoy your artistic journey.

My name is Carson Mackey and I specialize in mirror/glass. With over 8 years of experience in the glass/mirror industry, I am well-versed in all aspects of fabrication, repair and installation. I take great pride in providing my clients with the best quality of service and products. I am passionate about my work and strive to help my clients realize their vision.
Honestly, I am dedicated to providing the best services and products to my customers and I’m always open to learning new techniques and working with advanced materials. Basically, this is a place where I will share my thoughts and experiences on Mirror. And this website (http://mirrortopics.com) is an outlet of my deep passion for Mirror.
I want to clear about MirrorTopics that it’s not any agent or hired organization. It fully customize by me. So I hope, posted information will Realistic and authentic. Although I will do enough research before posting but if you notice any wrong or mistake on my article, please contact with me without any hesitation. As well as you can suggest me about content quality, authentication and so on by using our Contact US page. Thank you my friend to support me.