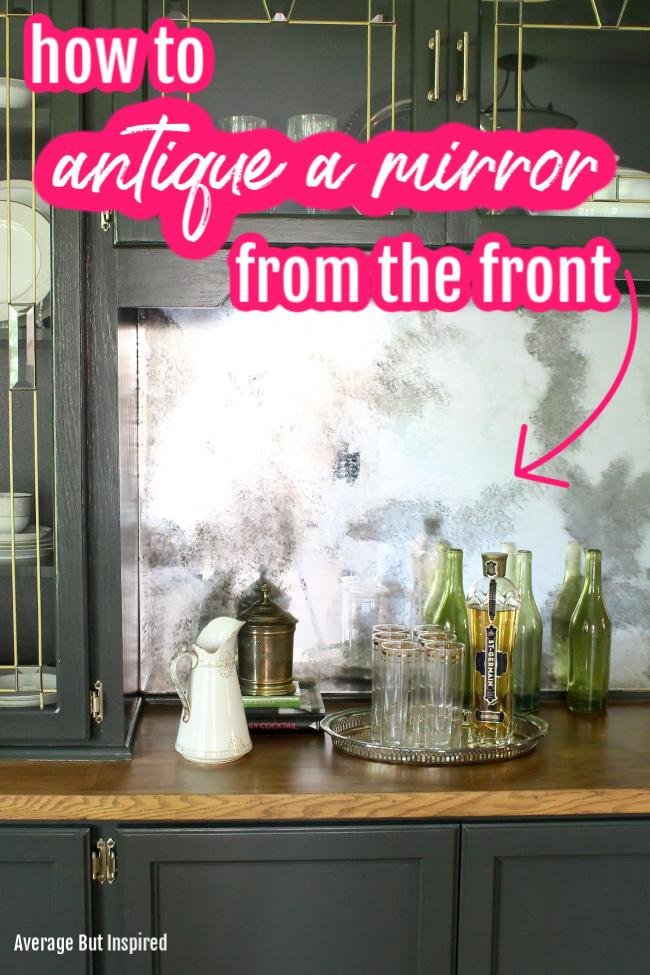
Antiquing a mirror from the front can give it a charming, vintage look. It’s a simple way to add character to any space.
Mirrors often serve as focal points in home decor. Giving a mirror an antique finish can transform its appearance, making it a unique piece with a story. Whether you have an old mirror you want to refresh or a new one you want to age, antiquing can be a fun and creative project.
In this guide, we’ll explore how to antique a mirror from the front, step by step. You don’t need to be a professional; just some basic tools and a bit of patience will do. Ready to start? Let’s dive in and give your mirror a beautiful, aged look.
Credit: www.thenavagepatch.com
Materials Needed
Antiquing a mirror from the front can add charm to any room. To do this project, you need specific tools and supplies. Gathering the right materials is crucial for a successful outcome. Here’s a list of what you’ll need.
Essential Tools
Several tools will help you achieve the antique look. First, get a screwdriver. This will help remove the frame from the mirror. Next, you need a utility knife. It will help scrape off the mirror’s backing. Also, have a paint scraper handy. It will help remove any stubborn spots. Finally, make sure you have a soft cloth. This will help clean the mirror without scratching it.
Recommended Supplies
In addition to tools, certain supplies are essential. You will need paint stripper. This will help remove the backing. Make sure to have some silver spray paint. It will help create an antique effect. You should also have some black acrylic paint. It will add depth to the antique look. Finally, get a bottle of bleach. It will help with the aging process. Use a spray bottle to apply it evenly.
Preparing Your Workspace
Clear your workspace by removing any clutter. Gather all needed tools, such as gloves, vinegar, and paint stripper. Set up in a well-ventilated area for safety.
Before starting your antique mirror project, set up your workspace. A well-prepared area ensures a smooth process and safety.Safety Measures
Wear gloves to protect your hands from sharp edges. Use safety glasses to shield your eyes from debris. Ensure the room is well-ventilated to avoid inhaling fumes. Keep a first-aid kit nearby for minor injuries.Setting Up The Area
Choose a spacious, well-lit area for your work. Cover the surface with old newspapers or a drop cloth. This protects your table from spills. Place all your tools and materials within easy reach. Ensure you have enough space to move around freely. “`Cleaning The Mirror
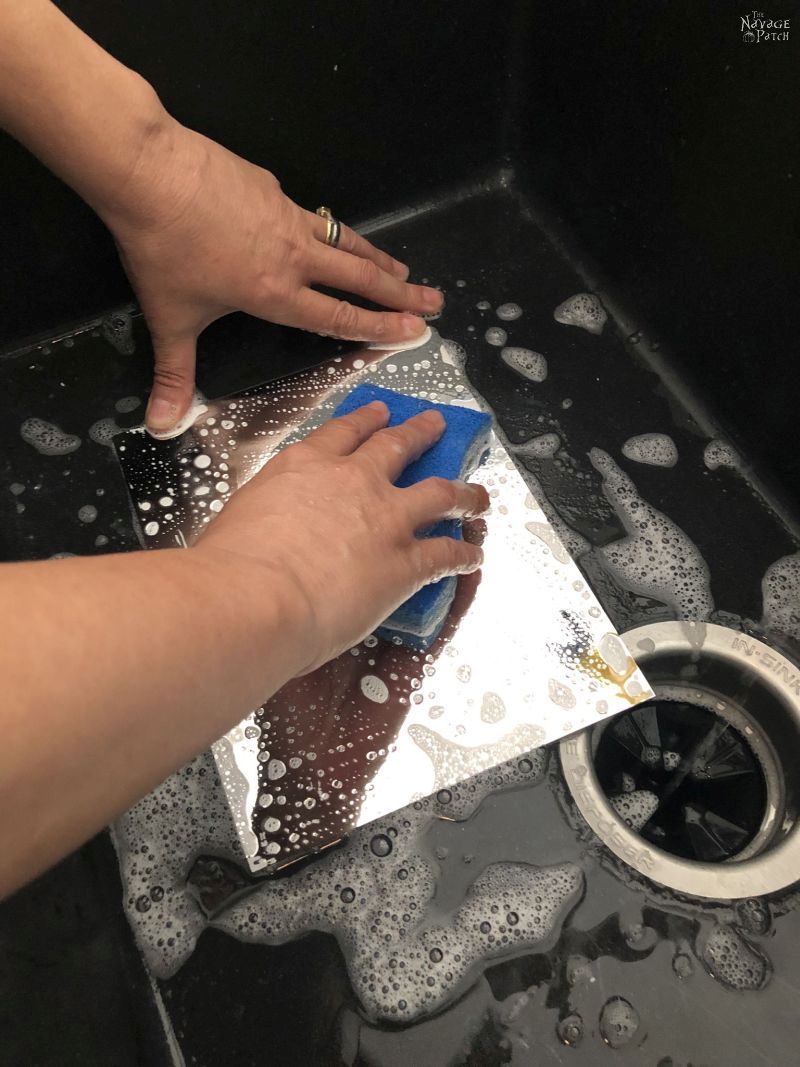
Cleaning the mirror is the first step to antique it from the front. A clean mirror ensures a smooth process and better results. It also helps in removing any residue that might interfere with the antiquing process.
Removing Dirt And Dust
Start by gently wiping the mirror surface with a soft cloth. This removes loose dirt and dust. Be sure to cover every part of the mirror, including the edges. For stubborn dirt, use a dry brush with soft bristles. This helps in getting rid of particles stuck in corners.
Using Cleaning Solutions
After removing dirt and dust, use a glass cleaner. Spray the cleaner on the mirror’s surface. Wipe it off with a lint-free cloth. This removes any remaining grime and fingerprints. If the mirror still looks dirty, mix water and vinegar. Use this solution to give it a final clean. Ensure the mirror is dry before moving to the next step.
Credit: averageinspired.com
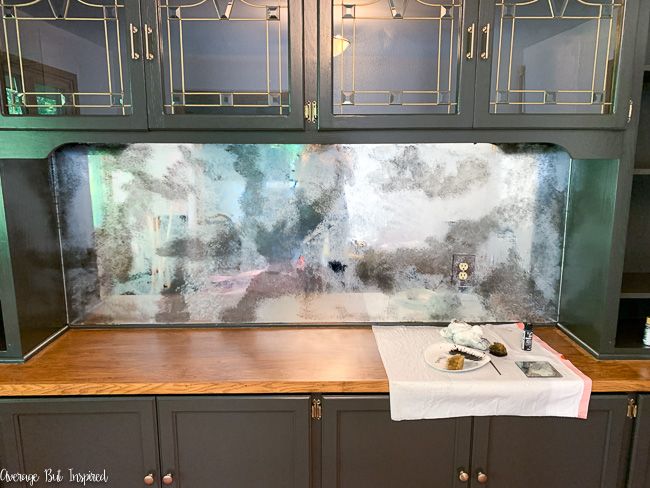
Applying The Antiquing Solution
Applying the antiquing solution to your mirror can transform its look. This process involves careful steps to ensure you get the desired antique effect. Let’s dive into how to mix and apply the solution for the best results.
Mixing The Solution
Start by gathering all the needed materials. You will need a spray bottle, vinegar, water, and a small amount of black paint. First, fill the spray bottle halfway with vinegar. Add an equal amount of water to the bottle. Finally, add a few drops of black paint. Shake the bottle well to mix the solution. This mixture will create the aged effect on your mirror.
Techniques For Application
Hold the spray bottle about one foot from the mirror’s surface. Spray a fine mist evenly over the entire surface. For a more aged look, focus on the edges and corners. Let the solution sit on the mirror for a few minutes. This allows the mixture to react with the glass. Then, use a soft cloth to gently blot and dab the mirror. This will create a varied pattern, enhancing the antique effect. Repeat the process if you want a more pronounced look.
Creating The Antique Effect
Antiquing a mirror can add charm and character to your decor. By using different techniques, you can create a vintage look. This process involves making the mirror appear aged and distressed. Follow these steps to achieve the antique effect.
Distressing Techniques
Distressing your mirror involves making it look worn and old. You can use various methods to achieve this effect. Here are some popular techniques:
- Scraping: Use a razor blade to scrape off parts of the mirror’s reflective coating. This creates a worn look.
- Sandpaper: Gently sand the mirror’s surface to dull the shine and create scratches.
- Chemical Distressing: Apply a solution of bleach and water to the back of the mirror. This will eat away at the reflective coating and create an aged look.
Use caution with each method to avoid damaging the mirror too much. Test on a small area first to see the effect.
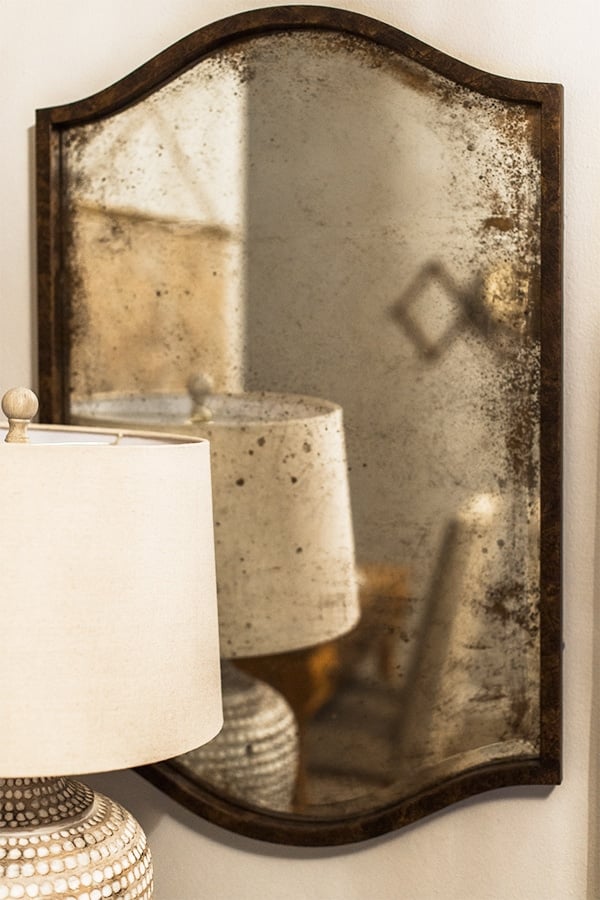
Enhancing Patina
Adding a patina can give your mirror a true antique feel. Patina is the natural tarnish that forms on metals and surfaces over time. Here’s how you can enhance the patina on your mirror:
- Vinegar Solution: Mix vinegar, water, and salt in a spray bottle. Lightly mist the back of the mirror. Let it sit and then wipe off. This will create a cloudy, aged effect.
- Paint: Use dark-colored paint to add fake patina. Apply it to the back of the mirror with a sponge or brush. Focus on the edges and corners for a natural look.
- Patina Kits: Purchase a patina kit from a craft store. Follow the instructions to apply a realistic patina finish.
Each of these methods can enhance the antique feel of your mirror. Experiment to find the effect you like best.
Credit: www.jennasuedesign.com
Sealing The Mirror
Sealing the mirror is a crucial step in antiquing. This ensures the antique look lasts. Proper sealing also protects your work from damage. Let’s explore how to choose and apply the right sealant.
Choosing The Right Sealant
Not all sealants are suitable for mirrors. Some may cause clouding. Always choose a clear, non-yellowing sealant. You want the antique look to stay sharp. Look for sealants specifically made for mirrors. Check for UV resistance. This prevents fading over time. Read product reviews and labels carefully.
Application Tips
Before sealing, ensure the mirror is clean. Remove any dust or residue. Use a soft, lint-free cloth. Apply the sealant in a well-ventilated area. Use a brush or spray, depending on the product. Follow the manufacturer’s instructions.
Apply the sealant in thin, even layers. Allow each layer to dry completely. This prevents streaks or bubbles. Be patient. Rushing can ruin the finish. Once done, let the mirror cure fully before handling.
Final Touches
You’ve worked hard to antique your mirror. Now, it’s time to add the final touches. This step ensures your mirror looks polished and authentic. Let’s dive into the key areas.
Inspecting The Mirror
Begin by inspecting the mirror closely. Look for any areas that need touch-ups. Use a soft cloth to clean any dust or debris. Check for streaks or smudges on the mirror’s surface.
If you see any spots that need more antiquing, use your materials sparingly. Too much can make the mirror look overdone. Aim for a balanced, aged appearance.
Also, ensure the frame is in good condition. Tighten any loose screws or nails. If the frame has any chips or cracks, consider repairing them for a more polished look.
Displaying Your Antique Mirror
Now, it’s time to display your antique mirror. Choose a spot that highlights its beauty. Consider placing it in a well-lit area to show off the antique details.
Here are a few tips for displaying your mirror:
- Hang it at eye level for the best view.
- Group it with other vintage items for a cohesive look.
- Use it as a focal point in your room.
These ideas can enhance your home’s decor and make your antique mirror a standout piece.
Antiquing a mirror from the front is a rewarding project. With these final touches, your mirror will look stunning and authentic.
Frequently Asked Questions
What Supplies Are Needed To Antique A Mirror?
To antique a mirror, you need mirror, paint stripper, muriatic acid, spray paint, and protective gear like gloves.
How Long Does It Take To Antique A Mirror?
Antiquing a mirror can take a few hours, depending on drying times and your experience level.
Can I Antique A Mirror Without Removing It?
Yes, you can antique a mirror without removing it, but protect surrounding areas with tape and covers.
Is It Safe To Use Muriatic Acid?
Using muriatic acid is safe if you wear gloves, goggles, and ensure proper ventilation.
Conclusion
Creating an antique mirror from the front is easy and fun. Follow the steps and enjoy the process. You’ll get a unique, vintage look. Your home will have more charm and character. Remember, practice makes perfect. Keep experimenting with different techniques.
Soon, you’ll master the art of antiquing mirrors. It’s a simple way to add elegance to any room. Try it today and see the difference. Happy crafting!

My name is Carson Mackey and I specialize in mirror/glass. With over 8 years of experience in the glass/mirror industry, I am well-versed in all aspects of fabrication, repair and installation. I take great pride in providing my clients with the best quality of service and products. I am passionate about my work and strive to help my clients realize their vision.
Honestly, I am dedicated to providing the best services and products to my customers and I’m always open to learning new techniques and working with advanced materials. Basically, this is a place where I will share my thoughts and experiences on Mirror. And this website (http://mirrortopics.com) is an outlet of my deep passion for Mirror.
I want to clear about MirrorTopics that it’s not any agent or hired organization. It fully customize by me. So I hope, posted information will Realistic and authentic. Although I will do enough research before posting but if you notice any wrong or mistake on my article, please contact with me without any hesitation. As well as you can suggest me about content quality, authentication and so on by using our Contact US page. Thank you my friend to support me.